Sunday, November 30, 2008

Coney Island

Parachute Jump
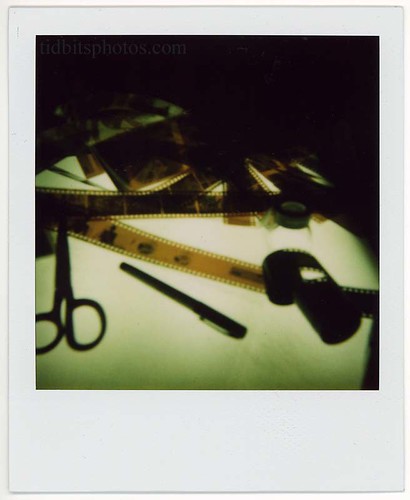
Coney Island. NYC. Summer 2008.

Tuesday, November 25, 2008

stuff and things

It's amazing how draining a seven hour day in the darkroom can be. But at least I got a lot done. Now I've gotta find time to scan all these prints. I did get around to making a few prints from the first roll run through my homemade pinhole. And I have to say that I'm quite pleased with the results. That's not to say that I was able to make some amazing images though. Since this was my first attempt at a homemade pinhole camera, I was measuring success in three ways. 1) Get light to the film. Check. 2)Expose the sprocket holes on the film. Check. 3) Get an image to show up on the film. Check. I achieved all three and learned stuff along the way. I could read all I want on making a pinhole, but I don't seem to have a very academic mind. I tend to learn more just by doing. And that's what I did. I really look forward to making progress on this whole homemade pinhole thing. I've already got different projects in mind. And of course I'll post up results here. Until then, enjoy this image.
Film

Thursday, November 20, 2008

TV Smith

TV Smith
TV Smith at CBGB a few years ago.

Wednesday, November 19, 2008

Infest

Infest
Infest at Spanky's Cafe. Sometime in the early 90's One of the most intense bands to see live. Nice guys too.

Tuesday, November 18, 2008

Developing news....

Tonight I got around to developing the first roll run through the homemade pinhole camera. The results are not amazing, but something does appear on film and to me that equals success. This after all was my first attempt at a making my own pinhole camera, so just getting light to film makes me pretty happy. The images look to be a tad blurry, but that's bound to happen when your pinhole was made with gaffer tape. I've done a bit more research and will have to make some adjustments to the camera.
I also developed the first roll run through my Ansco Rediflex. These came out pretty good. My only problem with this roll and to an extent the first roll through the homemade pinhole, is that I didn't have time to really wander around and get good images. Shorter days means no time after work. And when the weekends were here, so was shitty weather. Oh well. The two rolls were a decent test.
Darkroom time is booked for saturday. So some new images will be uploaded to my flickr site as soon as I scan the prints. Until then, enjoy this image.
Feeling the ocean

Friday, November 14, 2008

Homemade Pinhole

Pinhole photography has always fascinated me. It's just such a simple process, but it's also a bit complex. For years I've wanted to jump into this whole pinhole thing but just never knew exactly how. Then the Diana+ came out with the pinhole option and boom, I was in the game. Teaching myself through trial and error, with a bit of help from bits I've read at various places on the interweb. Success came slowly, and while I've been pleased with some of the pinhole shots I've been making with my Diana+, there just seems to be something lacking. I lack the funds to buy a nice Zero Image pinhole camera, so I thought, what the hell, I'll make my own. And that's what I did. My initial research into this project was a bit intimidating. Reading about measuring focal length and this info and that info. It was all a bit too technical for the limited knowledge that I've gathered. So I just went and started building a little box with a pinhole. 
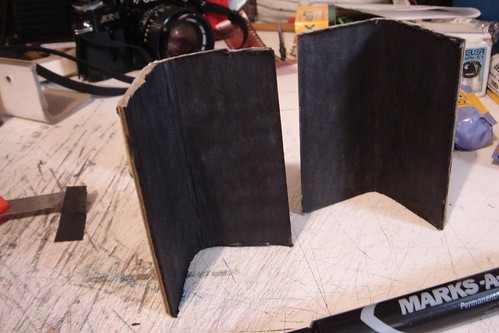
I took a small length of hardened cardboard. Cut two four inch long sections. And with a marker, blacked out the inside. I then drilled holes on the top, cut an old pen in two, notched one end of the pen bits, and stuffed them through the holes. These will hold the film in place and advance the film. I followed that with a hole in the front. I took two pieces of gaffer tape and cover the hole from the inside. I then pushed a pin through the tape, thus making my pinhole. 
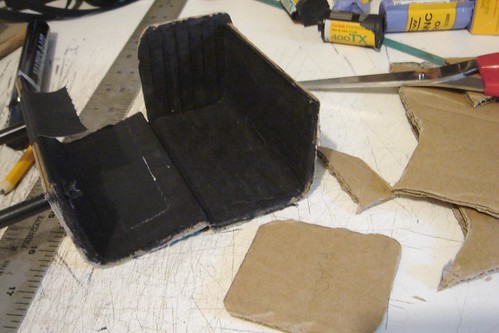
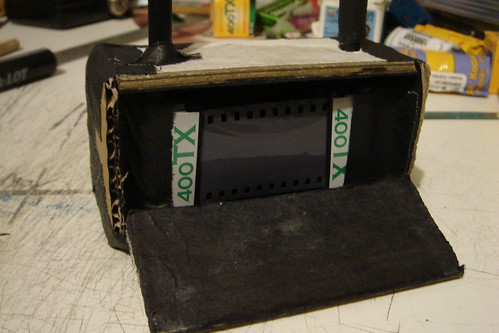
I cut some cardboard from an old box flap for the sides. And at this point, I was going to have the top/front section flip open. But after a bit of thought, this didn't make much sense. So, I cut the back piece and made a flap door so that I can load and unload the film. 
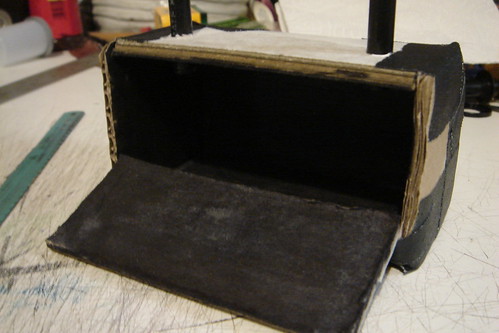
I put some foam in on the sides to help the film canisters stay in place. Using and old film canister as the take up spool, I stuffed in a roll of film, taped up the little box, and it's ready to roll. Now, since I didn't do any measurements, I'm not sure how my little box pinhole will work or what the results will be. No matter what though, I look forward to it. Even if they don't come out, it will at least be a learning a experience. And a fun one at that. I'll post the results when I develop the roll.

Monday, November 10, 2008

Radio Silence Photo Show moving on.....


The Radio Silence photo show is moving on. To Vermont to be exact. I will not be able to make it up for the opening. But if you're in the area, definitely stop by and check it out. There's some great photos in the show. I've got two in there.

Radio Silence / Selected Photography
November 14th - December 12th, 2008
Sanctuary Artsite
47 Maple Street
Burlington, Vermont 05401

Opening reception: Friday November 14th, 2008 / 5pm-8pm